PC SOLUTIONS

Tuesday, 21 October 2014


HOW TO FIX DISABLED AUDIO SOUND ON OS X 10.10 YOSEMITE.


As we know recently Apple formally released OS X Yosemite, its newest operating system for Mac computers. For most Mac users, the operating system has been much anticipated since it was first unveiled at the company’s annual developers conference in June 2014. The Yosemite OS is free, and is downloadable through the Mac App Store. 

Apple says that Mac computers from as far back mid 2007 will support OS X Yosemite, but as we have seen with any other new software releases, sometimes updating your old Mac to a newer software usually does not work out perfectly. One of the problem I encountered after upgrading my Macbook Pro to OS X Yosemite is that the volume icon at the top righthand task bar is greyed out and the audio sound does not work. Well if you ever encountered such similar problem, don't worry! Just follow the following steps carefully and it will fix the audio sound problem on your Mac without any hassle.

Before you start, open finder and on the empty search tab type Audio MIDI Setup, then select search:This Mac. Audio MIDI Setup icon will appear. Double click it and Audio Devices popup window will appear. Select Built-in Output and on the Format dropdown box click and select 48000.0 Hz instead of 44100.0 Hz. Once you have changed the Source format to 48000.0 Hz you will notice that the volume control icon at the top righthand task bar will be highlighted. Now just close the Audio Devices popup window and you are done.


Hope you find this article useful to you. 

Good Luck!

Joe
Sydney Australia.


Posted by Joeinsyd at 04:15 No comments:
Email ThisBlogThis!Share to XShare to FacebookShare to Pinterest

Tuesday, 25 February 2014

HOW TO SPEEDUP MAC OS X 10.9.1 MAVERICKS SHUTDOWN


Is your Mac slow at shutdown lately after upgrading your Mac OS X Mountain Lion 10.8 to Mavericks? Apparently some Mac users have reported this problem when trying to shutdown their Mac, such as having a grey screen with a spinning wheel rotating before your Mac actually shutdown. This can be a real nuisance having to wait for your computer to shutdown. Well in this article, I am going to show you how to resolve this problem and restore Mac OS X 10.9.1 Mavericks shutdown back to normal.

1. REPAIR DISK PERMISSIONS


Disk permissions are a disk utility that helps to verify and repair your disk for permission differences. In Mac OS X 10.9.1 Mavericks or earlier version, when the user run disk verification or repair disk permissions, Disk Utility searches and reviews each of the .bom files in /Library/Receipts/ and compares its list to the actual permissions on each file listed. If the permissions differ, Disk Utility will report and list out the difference (and corrects them) if you use the Repair feature. You can try running repair disk permissions and see if that makes a difference in speeding up your Mac shutdown time.


2. TRY RESETTING THE PRAM


1. Shut down the computer (by holding the power button).
2. Turn on the computer. Wait until you hear the boot sound.
3. Press and hold the Command, Option, P & R keys (simultaneously).
4. Hold the keys down until the computer restarts and you hear the startup sound for the second time.
5. Then release the keys.

The PRAM should now be reset to the default values. Now try shutting down your Mac and see if it makes any difference on the shutdown time. Otherwise do a reset of the SMC which will help in your shutdown issues.

3. RESET THE SMC (SYSTEM MANAGEMENT CONTROLLER)


The SMC can cause problems related to your Mac built-in fan, lights, video display, power supply and general performance & functionality. So by resetting the SMC it might help to speedup your Mac shutdown. To reset the SMC, just follow the following steps.


1. Shut down your Mac.

2. Plug in the power adaptor onto your Computer.
3. Press Shift + Control + Option keys and the power button at the same time.
4. Release all the keys and the power button simultaneously.
5. Press the power button to turn on your Mac.

Now that your Mac is up and running, try shutting it down and see if it makes any difference. If you think the shutdown speed is still slow then just follow step number 4 below which will certainly restore Mac OS X Mavericks shutdown back to normal. But before you perform step number 4, please backup all your files to an External drive or USB pen drive.


4. CREATE A NEW USER ACCOUNT


Go to click the apple logo on the taskbar and click System preferences, then click Users & Groups. A popup windows will appear. Click the lock to make changes. Click the + sign located at the bottom of the popup window. Another small popup windows will appear. On new account, click the up/down arrow and choose administrator then enter your (new) name and password. Click create user then click on login options. On automatic login, click the up/down arrow and choose your new user name that you have created. Finally click the lock to prevent future changes and you are done. Now reboot your Mac and it will bootup as a new user. Once your Mac is up and running, you can reload all your files that you have previously backup from your External drive or USB pen drive onto your Mac. Once you have done that, you can try shutting down your Mac and you will notice how fast your Mac shut down.


5. DOWNLOAD AND INSTALL iBOOSTUP. 


IBoostUP is a system maintenance tool which can help fix your Mac problems such as slow performance, fans that are constantly running or system error messages that cause crashes. It is an easy friendly software to use and is a very small and fast to download software. You can download it for free from
 Download Now. Once you have installed iBootsUP on your Mac, try running Disk Health "Scan and Fix" on your Mac. Regularly performing a Disk Health "Scan and Fix" will help to keep your Mac startup and shutdown times faster.

Hope you find this article useful to you.


Good luck !


Joe

Sydney, Australia.

Posted by Joeinsyd at 03:37 No comments:
Email ThisBlogThis!Share to XShare to FacebookShare to Pinterest

Wednesday, 11 December 2013

SOLVED! ....OLD WINDOWS XP NETWORK PRINTER PROBLEM RESOLVED ON MAC OS X 10.9 MAVERICKS.


Are you having problem with connecting to your network printer after upgrading your Mac to OS X Mavericks 10.9?  Resetting, deleting, and reinstalling your printer doesn't work whilst the printer drivers are correctly installed? Also the printer indicates it's paused but it won't respond to resume and this configuration worked perfectly before installing Mavericks on your Mac? Well in this article I will show you how to resolve your old Windows XP network printer problem without costing you to buy a new printer. 

Please follow the steps below carefully in order to connect and print through your network printer.


On your Windows XP Computer:

1. Add Other Network File and Print Services on your Computer: 

Go to START > Control Panel and click Add or Remove Programs. Select Add/Remove Windows Components. A pop up window will appear. Browse through and Check Other Network File and Print Services. (Note: you will be prompted to require Windows XP install CD to complete the installation). Just insert your Windows XP install CD onto your CD-rom and the installation will be completed automatically.

2. Verify the installation of additional components:  

Go to START > Control Panel and click on Folders and click on Administrative Tools and click on Services. A popup Services window will appear. Find and locate TCP/IP Print Server to make sure it is started. Right Click and select Properties and change Startup type from Manual to Automatic. Also browse through the Services window and make sure Print Spooler, RPC and IPSEC are started with Automatic Startup too.

3. Lookup your printer IP address: 

Usually the printer IP address is the same as your Computer IP address. Go to START > Control Panel and click Network and Internet connection. Select and click on Network Connection. Double click Local Area Connection and Click on the Support Tab. A dialog box will appear showing your IP address. Write down your IP address, as you will require it to set up your printer later on your Mac. Alternatively you can also check out your printer IP address from your printer's manufacturer manual on printers configuration.

4. Tweak and Configure Windows XP Firewall: 

Go to START > Control Panel and select Network and Internet Connections. Click on Windows Firewall and click Exceptions Tab and check File and Print Sharing. Then click Add Port and on the Name column, type in Line Printer Daemon. Type in 515 on the Port Number column and leave TCP selected and press OK. Now Windows XP shared printer is configured to use for Line Printer Daemon (LPD).

On your Mac Computer:

1. Click the Apple logo and select System Preferences. Click Printers and Scanners. Click on the + sign to add your network printer. Select IP option and then enter your Windows XP printer IP address on the Address column. Protocol should be Line Printer Daemon- LPD. On Queue section just type in your printer name (make sure it is the same printer name that is shown on your Windows XP Computer. This is extremely important otherwise it will not work!). And on the Name section type in your printer name (shared printer name as appeared on your Windows XP Computer). Leave Location blank. Select your printer driver in the Use column and click Add.  If you cannot locate your printer driver on the selection provided, you can try selecting and using Generic PCL Printer. It might still work on your Mac. Now reboot your Mac and try printing. 

Good luck!

Hope this article can help solve your network printer problem on your Mac.

Joe
Sydney
Australia.


Posted by Joeinsyd at 15:05 No comments:
Email ThisBlogThis!Share to XShare to FacebookShare to Pinterest

Thursday, 24 October 2013


HOW TO FIX PARALLELS DESKTOP 8 ERROR ON MAC OS X MAVERICKS.


Now with the latest Mac desktop operating system, Mac OS X Mavericks is available for free download from Mac App Store. All Mac users can now experience the latest features and enjoy the most advanced technologies ever built today into every Mac computer. Mac OS X 10.9 also comes with powerful apps for browsing the web, sending messages, setting reminders, and so much more. All the apps work great with iPhone, iPad and iPod touch too. Thanks to Apple, all Mac users can now enjoy the world's most advanced desktop operating system for free. 

However with Mac OS X Mavericks as host system, Parallels Desktop 8 will not work if Mac users does not install the latest update on their virtual machine after installing the latest Mac OS X operating system on their computer. In this article I am going to show you the easy way on how to get started using Parallels Desktop 8 on Mavericks for free.

If you are trying to launch Parallels Desktop 8 on your Mac after installing Mac OS X 10.9 and encountered the following error:-

1. No Virtual Machine can be started,

2. Your Virtual Machine may run slow because virtualisation support is disabled on your Mac,


3. Parallels Desktop virtual machine not activated, or

4. The Virtual Machine  performance may be degraded because the hardware virtualisation support is  disabled on the host computer - Drivers are not installed.


Then try to do the latest updates on your Parallels Desktop 8 and if you still encounter a problem launching your virtual machine after performing the latest update,  then go to http://kb.parallels.com/en/5802 and download the latest updates version 8.0.18494 onto your Mac.
Once you have finished downloading the updated file, just find and locate the file from your downloads folder and double click on the file to start updating your Parallels Desktop 8 to the latest version. On completion remember to restart your Mac before you try launching your virtual machine. It is important that you follow this procedure carefully otherwise it will not work.

Hope you find this article useful to you.

Good luck!

Joe
Sydney
Australia.


Posted by Joeinsyd at 21:13 No comments:
Email ThisBlogThis!Share to XShare to FacebookShare to Pinterest

Thursday, 29 August 2013


HOW TO DISABLE POP UP MESSAGE "ONLY SECURE CONTENT IS DISPLAYED" ON INTERNET EXPLORER 10.


Have you noticed lately on your Computer, Internet Explorer shows a pop up message "Only Secure Content is displayed" each time when you load up your web browser? This happens after you performed a latest update on Windows 7. In this article I am going to show you the easy way on how to disable this annoying pop up message on your Internet Explorer 10 by following the simple steps below.


1. Open Internet Explorer and go to Tools and select Internet Options.

2. Click on Security tab. 


3. On select a zone to view or change security settings, Highlight and select Internet zone ( normally is highlighted by default).

4. Click on Custom level button under Security for this zone section.

5. A pop up window "Security setting Internet zone" will appear. Stroll down by using the down arrow located on the right side of the window and locate Display mixed content setting and click on enable.

6. Click OK and if you are asked to confirm to change the settings for this zone just click OK. 

7. Close Internet Explorer and you are done.

The next time you load up your Internet Explorer web browser, it will automatically display all secure or non-secure content on a web page without warning and the pop up message will not appear again.

Hope you find this tutorial useful to you.

Joe 
Sydney Australia.


Posted by Joeinsyd at 00:53 No comments:
Email ThisBlogThis!Share to XShare to FacebookShare to Pinterest

Saturday, 10 August 2013

HOW TO FIX WINDOWS 7 PCI DEVICE DRIVER ERROR ON PARALLELS DESKTOP VIRTUAL MACHINE FOR MAC.


Windows 7 PCI drivers are essential for Computers running on Windows 7 operating system. It influences the performance of your Computer in some ways especially if you are running Windows 7 on Parallels Desktop on your Mac. Usually when this error occurs, Windows 7 screen cannot go full size on Parallels Desktop. In this article I am going to show you how to fix Windows 7 PCI device driver error on your Mac without spending a dollar from your own pocket or investing in any hardware upgrades. Note: you can also detect this error on Windows 7 System Devices Manager. 


HOW TO FIX THE PROBLEM:

1. Click and open Parallels Desktop Virtual Machine. On the Parallels Desktop toolbar select Virtual Machine and click on Reinstall Parallels Tools.

2. Insert Parallels Desktop CD onto your optical disk drive.

3, Load and install Parallels Tool onto Windows 7.

4. Reboot Windows 7 and the problem are fixed.

Hope you find this article useful to you.

Good luck!

Joe
Sydney Australia.

Posted by Joeinsyd at 20:22 No comments:
Email ThisBlogThis!Share to XShare to FacebookShare to Pinterest

HOW TO CHANGE USER FOLDER NAME OF A USER PROFILE IN WINDOWS 7


In this tutorial I am going to show you how to change the User folder name on your Computer running on Windows 7. If by chance you have mistyped the wrong characters on your computer by accident during installation of Windows 7 and wanted to change the name that you have mistyped or you are stuck with an unwanted computer/user name then you can follow this tutorial to change it to your desire user name. 

1. If you do not have another administrator account to use, then start by creating a new administrator account. Go to Control Panel and select User Account to create a new user account. Once you have done that you can then log off and reboot your Computer. Note: When you have finished with this tutorial, you can go and delete this newly created account.

2. Log on to an administrator account that is not the user account that you want to modify or change the name. Open Windows Explorer and navigate to C:/Users. Right click on the user profile folder that you want to change the name. A popup window will appear. Select Rename and type the name (new name) that you desire to change and press Enter. Note: If you are unable to rename the user folder for some reason, just reboot your computer into Safe Mode and try again. (For Mac computer press F8 + Fn keys and reboot into Safe Mode). Now close the Windows Explorer window and click on the Start Menu. On the empty Search programs and files box type regedit and press Enter.

3. In regedit, navigate to HKEY_LOCAL_MACHINE>Software>Microsoft>Windows NT>CurrentVersion>ProfileList. Expand ProfileList and select each long number S-1-5-..... key one by one until you see the old user name that you want to change. Then right click on ProfileImagePath and click on Modify. Type on the new user account name and click OK. Then close regedit window.


4. Open Control Panel and click on User Accounts. Select Manage another account and click on the old user account that you want to change the name. Click on Change the account name and type in the new desire user name instead and click Change Name. Now you will notice that the user account name has been replaced with the new user name. Close the Change an Account popup window and you are done.

5. Log off and reboot your Computer. The next time your Computer boot up, you will notice that the User name has been renamed to a new one.

Hope you find this article useful to you.

Good luck!

Joe
Sydney Australia.


Posted by Joeinsyd at 01:16 No comments:
Email ThisBlogThis!Share to XShare to FacebookShare to Pinterest

Friday, 12 April 2013

HOW TO DISABLE PASSWORD EXPIRATION ON WINDOWS 7


Are you annoyed when Windows 7 notified you with a pop up message that your password is about to expire on your Computer and you want to know how you can prevent such message from popping up? Well in this article I am going to show you the quick and easy way on how to disable the annoying expiration message on your Computer. 

FOR WINDOWS 7 PROFESSIONAL, ULTIMATE AND ENTERPRISE EDITIONS:

1. Open the Local Users and Groups Manager. First go to click Start and on the empty Search Programs and Files box just type: lusrmgr.msc and press Enter. A pop up window will appear. Double click on Users and a different pop up window will appear showing a list of users on your Computer. Double click on your username for example if your username is John, just double click it and a small pop up window will appear as shown below. 


Check the box next to Password never expires and click OK. Reboot your Computer and your are done. 

FOR WINDOWS 7 HOME PREMIUM:

1. Run Command Prompt as Administrator by Clicking on Start and on the empty Search Programs and Files box type: Command Prompt. Right click the menu item for it and select Run as administrator.

2. Type the following command at the prompt: net accounts /maxpwage: unlimited 

3. Press Enter and you are done. 

4. Restart your Computer and Windows 7 password expiration is now disabled.


I hope you find this article useful to you. 

Good luck!

Joe
Sydney, Australia.


Posted by Joeinsyd at 00:29 No comments:
Email ThisBlogThis!Share to XShare to FacebookShare to Pinterest

Friday, 11 January 2013

HOW TO SPEEDUP iTUNES 11.0.1 STARTUP


iTunes 11.0.1 is a free app for Mac OS X and Windows PC. It is the most popular free digital music and video player available at the moment for download from Apple Store. It synchronises all your music and video files content to your iPod, iPhone, iPad and Apple TV.  A most recent survey has indicated that most iTunes user have complained that it takes ages to load up iTunes on their computer. In this article, I am going to show you how to speedup iTunes 11.0.1 startup time for free.

DISABLE  SMART PLAYLIST.

Most iTunes user love the Smart Playlist feature found on iTunes. Removing Smart Playlist feature is not what I will recommend here, but editing and disabling Live Updating option will certainly result in 3 times faster startup speed. 

To remove the Live Updating feature on iTunes, just right click on the playlist. Select Edit Smart Playlist and uncheck Live Updating. Then click OK and you are done. Restart iTunes and you will notice how fast iTunes will take to startup.

DISABLE AUTOMATIC SYNC.

Usually when you connect a device onto your computer, iTunes automatically detects and starts syncing all your apps, music and video files onto your device. This could be quite annoying and may result in iTunes get freeze up for about 30 seconds or more. I suggest you disable automatic syncing to avoid this from happening.
To disable automatic syncing, just select your connected device from the left iTunes sidebar and uncheck Automatic Sync option and you are done.

DISABLE GENIUS.

As we know the iTunes Genius feature helps to discover more music from what you listen and compare your music preference with others. This feature uses a lot of resources and can cause iTunes to slow down to a crawl. To disable Genius, just go to Store menu and select Turn off Genius as shown below.

Once you have Turn off Genius, just restart iTunes and you will notice how fast iTunes will load up the next time you launch iTunes on your computer.

I hope you find this article useful to you.

Good luck!

Joe
Sydney, Australia.


Posted by Joeinsyd at 00:21 No comments:
Email ThisBlogThis!Share to XShare to FacebookShare to Pinterest

Wednesday, 5 December 2012


HOW TO FIX ERROR 3194 FROM iTUNES DURING iPHONE, iPAD OR iPOD TOUCH RESTORE.

In this article I am going to show you how to fix Error 3194 within iTunes when you try to restore your iPhone, iPad or iPod Touch back to default factory settings. Error 3194 usually pop up on your computer when unsigned firmware is used on your devices, especially during some restores or iOS software downgrade of your iPhone or iPad. To fix this error you need to temporarily block Apple's firmware signing services before you can restore your devices back to the original factory settings.
Just follow the following steps carefully to resolve this error.


FOR MAC OS X OPERATING SYSTEM:

1. First of all you need to quit and close iTunes on your Mac.

2. Find and locate your host's file on your Mac. The host file is /etc/hosts.

3. Open the hosts' file with administrator privileges and then edit the host file by typing 
   74.208.105.171 gs.apple.com to the bottom of the host file. Then close to save the file.

4. Connect your iPhone, iPad or iPod Touch to your Mac and launch iTunes.

5. Turn on your iPhone, iPad or iPod Touch into DFU mode by holding down the sleep and power  
    button at the same time for 10 seconds. Release the power button after 10 seconds but continue to  
    hold onto the home button until iTunes notify you with a pop up window on your Mac indicating   
    that your device is in recovery mode. Now go to the restore feature provided on iTunes to restore
   your device by clicking Restore.

Once your iOS is updated and finished on your device, you can then go back to your hosts file that you have previously edited and delete the 74.208.105.171 gs.apple.com line from your hosts file. Close to save the hosts file and you are done. Once you have done that iTunes can now update all software normally for you from now on.

FOR WINDOWS OPERATING SYSTEM:

1. Quit and close iTunes on your Computer.

2. Find and locate your host's file. In this case is c:\windows\system32\drivers\etc\hosts.

3. Open the hosts' file with Windows Notepad and type 74.208.105.171 gs.apple.com to the
    bottom end of the host file. Then close and save the file.

4. Connect your iPhone, iPad or iPod devices to your Computer and then launch iTunes.

5. Turn on your iPhone, iPad or iPod Touch into DFU mode by holding down the sleep and power
    button at the same time for 10 seconds. Now release the power button but continue
    to hold down the home button until you see a pop up window appeared on iTunes notifying
    you that your device is now in recovery mode. Use the restore feature provided on iTunes to
    restore your device by selecting Restore.

Again once your iOS update is completed on your device, you can go back to your host file that you have previously edited and delete the 74.208.105.171 gs.apple.com line from your hosts file. Close  and save the hosts file and you are done.

Hope you find this article useful to you.

Good luck

Joe
Sydney, Australia.


Posted by Joeinsyd at 21:10 No comments:
Email ThisBlogThis!Share to XShare to FacebookShare to Pinterest

Monday, 19 November 2012

HOW TO SPEEDUP WINDOWS 8 (QUICK & EASY TIPS)

Tips to speedup Windows 8  

In this article, I am going to show you how to fine tune and speedup Windows 8 on your computer without costing you to spend a dollar from your own pocket. The following are a few tweaks you can do to speedup Windows 8. 

1. DISABLE UNNECESSARY SERVICES FOR MORE SPEED.


One of the best ways to speedup Windows 8 is to disable all unnecessary services running in the background. Most services can be safely be disabled and would otherwise consume up all your system resources. To disable all unnecessary services that you think you don't need, just do the following. Go to click Start and on the empty search programs and files box type msconfig and hit Enter.  A system configuration popup window will appear. Select Services and a list of services will appear. Just uncheck any services you think you don't need and click OK. Close the popup window and then choose to reboot your computer.


2, SPEEDUP FILES ACCESS.

This tweak will help you to increase your access to any files faster. All you have to do is to adjust the MouseHover time on your system registry. To tweak this just go to click Start and on the Run popup window, just type regedit and hit Enter. A Registry Editor popup window will appear as shown below. Just select HKEY_CURRENT_USER>Control Panel>Mouse and double click MouseHoverTime. By default the value is 400. Just change that to 100, then close the popup window and you are done.


3. MAKE MENUS LOAD FASTER.

Have you ever noticed on your computer, every time you click on any Menus it takes a while to load up? Well, here is a tweak you can do to make Menus load faster. Go to click Start, on the empty Search Programs and files tab, type regedit and press Enter. Now navigate to HKEY_CURRENT_USER>CONTROL PANEL\DESKTOP, select MenuShowDelay, then right click it and select Modify. Change the default number from 400 to around 100, but not too less. Then close the popup window and you are done.

4. REMOVE UNUSED PROGRAMS.

Most Windows' users, tend to download free software and games to evaluate or try them out on their computers. Usually after a while, most of the software and games are no longer required to be used, and are left in their systems which takes up valuable disk space, which will in turn slow down their computers. Regularly checking and removing unwanted programs and software will definitely helps speedup your computer. To remove any unwanted programs, go to click Start>Control Panel, click on Uninstall a Programs, and scroll down the list to check out which programs you do not need and double click it. That way, it will automatically uninstall from your computer and you are done.


5. REDUCE VISUAL EFFECTS.

As we all know, Windows 8's OS interface looks very impressive, but displaying all the visual effects can be a waste of system resources and slow down your computer. To optimize your system, go to Start, right click My Computer, click Properties and clickAdvanced system settings, and go to the Advanced tab and click Settings, and choose "Adjust for best performance". If you still want to keep the look of Windows 8, I would suggest you to leave the last 4 check boxes selected. Click OK and you are done. So the next time you reboot your computer you will notice the difference how fast your computer will startup.

6. DOWNLOAD & INSTALL CCLEANER.


CCleaner is the number-one tool for cleaning your Windows PC. It protects your privacy online and makes your Computer faster and more secure. It is an easy friendly software to use, and is a very small and fast to download software. You can download for free from the link here: http://www.filehippo.com/download_ccleaner/

Once you have installed CCleaner on your Computer, just launch it and click on Tools, and then click on Startup. You will notice a list of startup items on the pop up window. Just disable all those items you think you don't need to startup when Windows 8 boot up by clicking on the items and then click Disable. I would suggest you disable programs such as Adobe ARM, ITuneshelper, QuickTime Task, SunJavaUpdateSched, Skype etc that you don't need to run each time when Windows 8 startup. Once you have done that, close CCleaner and reboot your Computer. You can use CCleaner to clean out all your junk files and internet history and caches. You don't need these files in your computer to take up unnecessary disk space. To maintain your computer speed always optimise your computer with a good registry cleaner.

7. IMPROVE BOOTUP TIME.

Go to click Start and on the Run popup window, just type msconfig and hit Enter. A System Configuration window will appear. On the Timeout box you will notice by default the value is 30. Just change the value to 3. Next select Boot and then select Advance Options. Another popup window will appear. Check the number of processor box and select 2 instead of 1. Close the window and you will be prompted to restart your computer. Click Yes and the next time your computer reboot you will notice how fast Windows 8 bootup.


8. SPEEDUP WINDOWS 8 SHUTDOWN.

This is another simple registry tweak that you can perform yourself to speedup Windows 8 shutdown time. Go to click Start and on the Run popup window, just type regedit and hit Enter. A Registry Editor popup window will appear.  

Just select HKEY_LOCAL_MACHINE>SYSTEM>CURRENTCONTROLSET>CONTROL and double click WaitToKillServices. Change the default value to 1000 and reboot your computer. The next time Windows 8 shutdown you will notice how fast it will be. 

Hope you find this article useful to you.


Good luck!


Joe

Sydney, Australia.


Posted by Joeinsyd at 18:34 No comments:
Email ThisBlogThis!Share to XShare to FacebookShare to Pinterest

Sunday, 7 October 2012


HOW TO SPEEDUP WINDOWS 8 RUNNING ON PARALLELS DESKTOP FOR MAC


This tutorial shows you how to optimize Parallels Desktop for Mac for the best performance of Windows 8 operating as a guest OS on your Mac. First of all before you fine tune your Windows 8 operating system, you should first give Parallels Desktop configuration options a good tune up so that you get the best performance out of Windows 8 as a guest OS on your Mac.

In this article, I am going to show you how to fine tune Parallels Desktop 8 and Windows 8 running as a guest OS on your Mac without costing you to spend a dollar from your own pocket. The following adjustment should be making before you startup Windows 8 on Parallels Desktop. First load up Parallels Desktop Virtual Machine on your Mac. Click to select Virtual Machine option located on the Parallels Desktop taskbar and select Configure. A small popup window will appear. Select General and then click the lock button located at the bottom left-hand corner to make changes. Another popup window will appear prompting you to enter your password. Just type in your password to unlock and make changes. Go to CPUs option on the popup window and you will notice that by default the CPUs is 1. Click the down arrow and change that to 2. Then go to Memory and change the default setting of 1000MB to 1536MB by moving the memory slider bar. Finally click the lock button to prevent any further changes. Close the popup window and you are done.

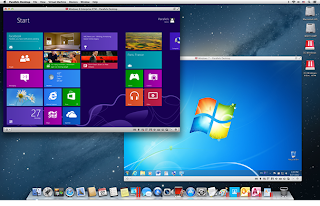
Now you can startup Windows 8 on your Parallels Desktop Virtual Machine. Once Windows 8 is launched, you can customize the performance of the guest OS itself. The following are a few tweaks that you can do to speedup Windows 8.

1. DISABLE UNNECESSARY SERVICES FOR MORE SPEED.

One of the best ways to speedup Windows 8 is to disable all unnecessary services running in the background. Most services can be safely be disabled and would otherwise consume up all your system resources. To disable all unnecessary services that you think you don't need, just do the following. Hold down the Command key and press R. A small Run popup window will appear and on the empty space just type msconfig and hit Enter. A system configuration popup window will appear. Select Services and a list of services will appear. Just uncheck any services you think you don't need and click OK. Close the popup window and then choose to reboot your computer.

2, SPEEDUP FILES ACCESS.

This tweak will help you to increase your access to any files faster. All you have to do is to adjust the MouseHover time on your system registry. Hold down the Command key and press R. On the Run popup window just type regedit and hit Enter. A Registry Editor popup window will appear as shown below. Just select HKEY_CURRENT_USER>Control Panel>Mouse and double click MouseHoverTime. By default the value is 400. Just change that to 100, then close the popup window and you are done.


3. IMPROVE BOOTUP TIME.

Hold down the Command key and press R. On the Run popup window just type msconfig and hit Enter. A System Configuration window will appear. On the Timeout box you will notice by default the value is 30. Just change the value to 3. Next select Boot and then select Advance Options. Another popup window will appear. Check the number of processor box and select 2 instead of 1. Close the window and you will be prompted to restart your computer. Click Yes and the next time your computer reboot you will notice how fast Windows 8 bootup.

4. SPEEDUP WINDOWS 8 SHUTDOWN.

This is another simple registry tweak that you can perform yourself to speedup Windows 8 shutdown time. Hold down the Command key and press R. On the Run popup window, just type regedit and hit Enter. A Registry Editor popup window will appear. Select HKEY_LOCAL_MACHINE>SYSTEM>CURRENTCONTROLSET>CONTROL and double click WaitToKillServices. Change the default value to 1000 and reboot your Windows 8. The next time Windows shutdown you will notice how fast it will be. 

Hope you find this article useful to you.

Good luck!

Joe
Sydney, Australia.


Posted by Joeinsyd at 03:44 No comments:
Email ThisBlogThis!Share to XShare to FacebookShare to Pinterest
Older Posts Home
Subscribe to: Posts (Atom)

Blog Archive

  • ▼  2014 (2)
    • ▼  October (1)
      • HOW TO FIX DISABLED AUDIO SOUND ON OS X 10.10 Y...
    • ►  February (1)
  • ►  2013 (7)
    • ►  December (1)
    • ►  October (1)
    • ►  August (3)
    • ►  April (1)
    • ►  January (1)
  • ►  2012 (23)
    • ►  December (1)
    • ►  November (1)
    • ►  October (1)
    • ►  July (4)
    • ►  May (4)
    • ►  April (12)

About Me

Joeinsyd
View my complete profile
Simple theme. Powered by Blogger.